Several days ago I bought a Xtreamer Ultra 2. The device come with pre-installed OpenELEC, however the version of the OS is very old. So first thing, I had to update the OS to a new one. The installer for OpenELEC isn’t like other installers; with OpenELEC, the first thing you do is create a USB key that you can install from. This installer key is what we’re going to create in this first part.
Things you’ll need:
- A Windows computer (your normal PC)
- A USB key to use as your installer
- The latest release of Ultra compatible OpenELEC
The latest version of OpenELEC for Xtreamer Ultra 2 you can get from the site: http://openelec.tv/get-openelec/viewcategory/6-xtreamer-ultra-builds However the version for Xtreamer is not the last version of OpenELEC, so I used the latest version from the link: http://openelec.tv/get-openelec/viewcategory/3-ion-builds Once it’s downloaded, you’ll have a file that ends in .tar.bz2 - this file contains the OpenELEC installer files. Once the files have extracted, enter the folder you extracted to and you should see lots of files and folders. The file we’re most interested in is create_installstick.bat which will create an installer USB key.
-
Double click create_livestick.bat
-
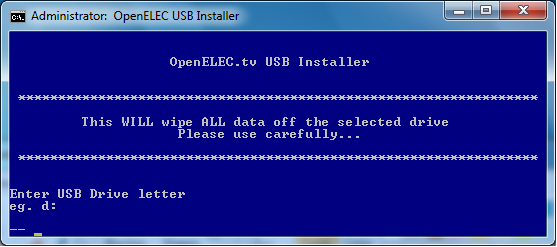
Insert your installer USB key.
Note: This will wipe the USB drive! Be careful to not have any important information on it.
Now, double-click on the batch file and you should get a new window appear.
Note: If you’re running Windows Vista or Windows 7, administrator rights are required. If your current account needs elevating, before the above window appears, you’ll be prompted by windows’ UAC:
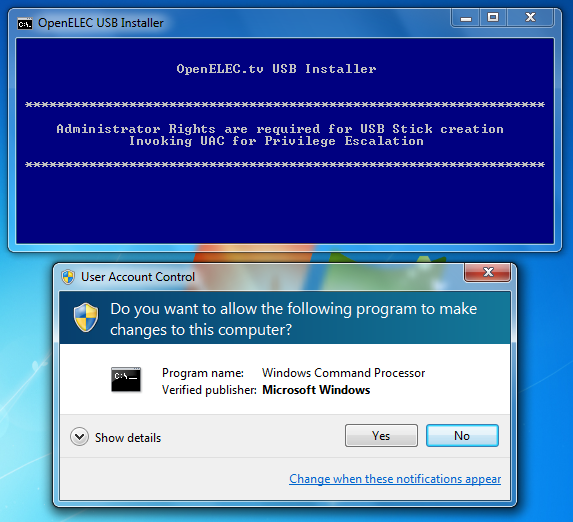
Simply click ‘Yes’ to continue.
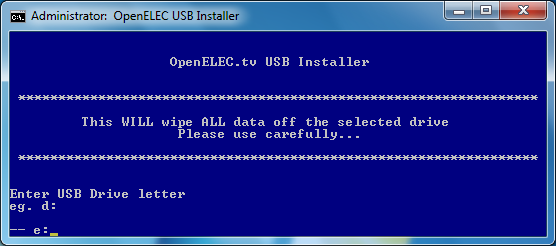
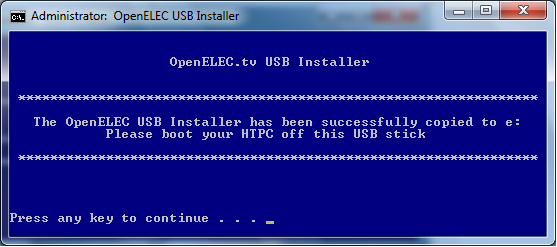
After a quick check in My Computer, I can see my USB key is E. So I enter the following and press enter:
The installer now creates the bootable USB stick:
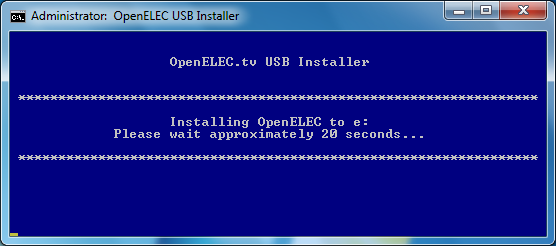
After around 20 seconds, it’s finished:
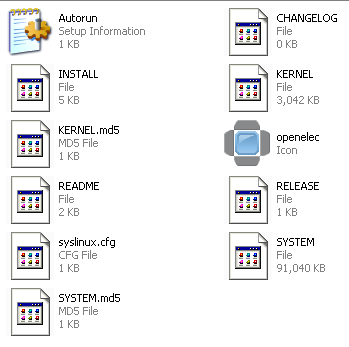
Have a look at your USB key in Windows explorer quickly - you should see the following files if all has gone well:
Safely remove your USB key.
Insert your installation USB key into your powered-off Ultra. Start the computer and make sure it boots from the USB key.
In case the computer does not start from USB key you should change boot priority in BIOS.
You can enter Xtreamer Ultra BIOS using remote control or mini keyboard. Turn the Ultra ON (power button on the remote) and then press CLS(Clear) on remote control or Fn + DEL buttons on remote keyboard repeatedly before the intro screen disappears.
Select tab Boot and set as first boot priority your USB Key and press F10 (Save & Exit).
If all goes well, you should get the screen:
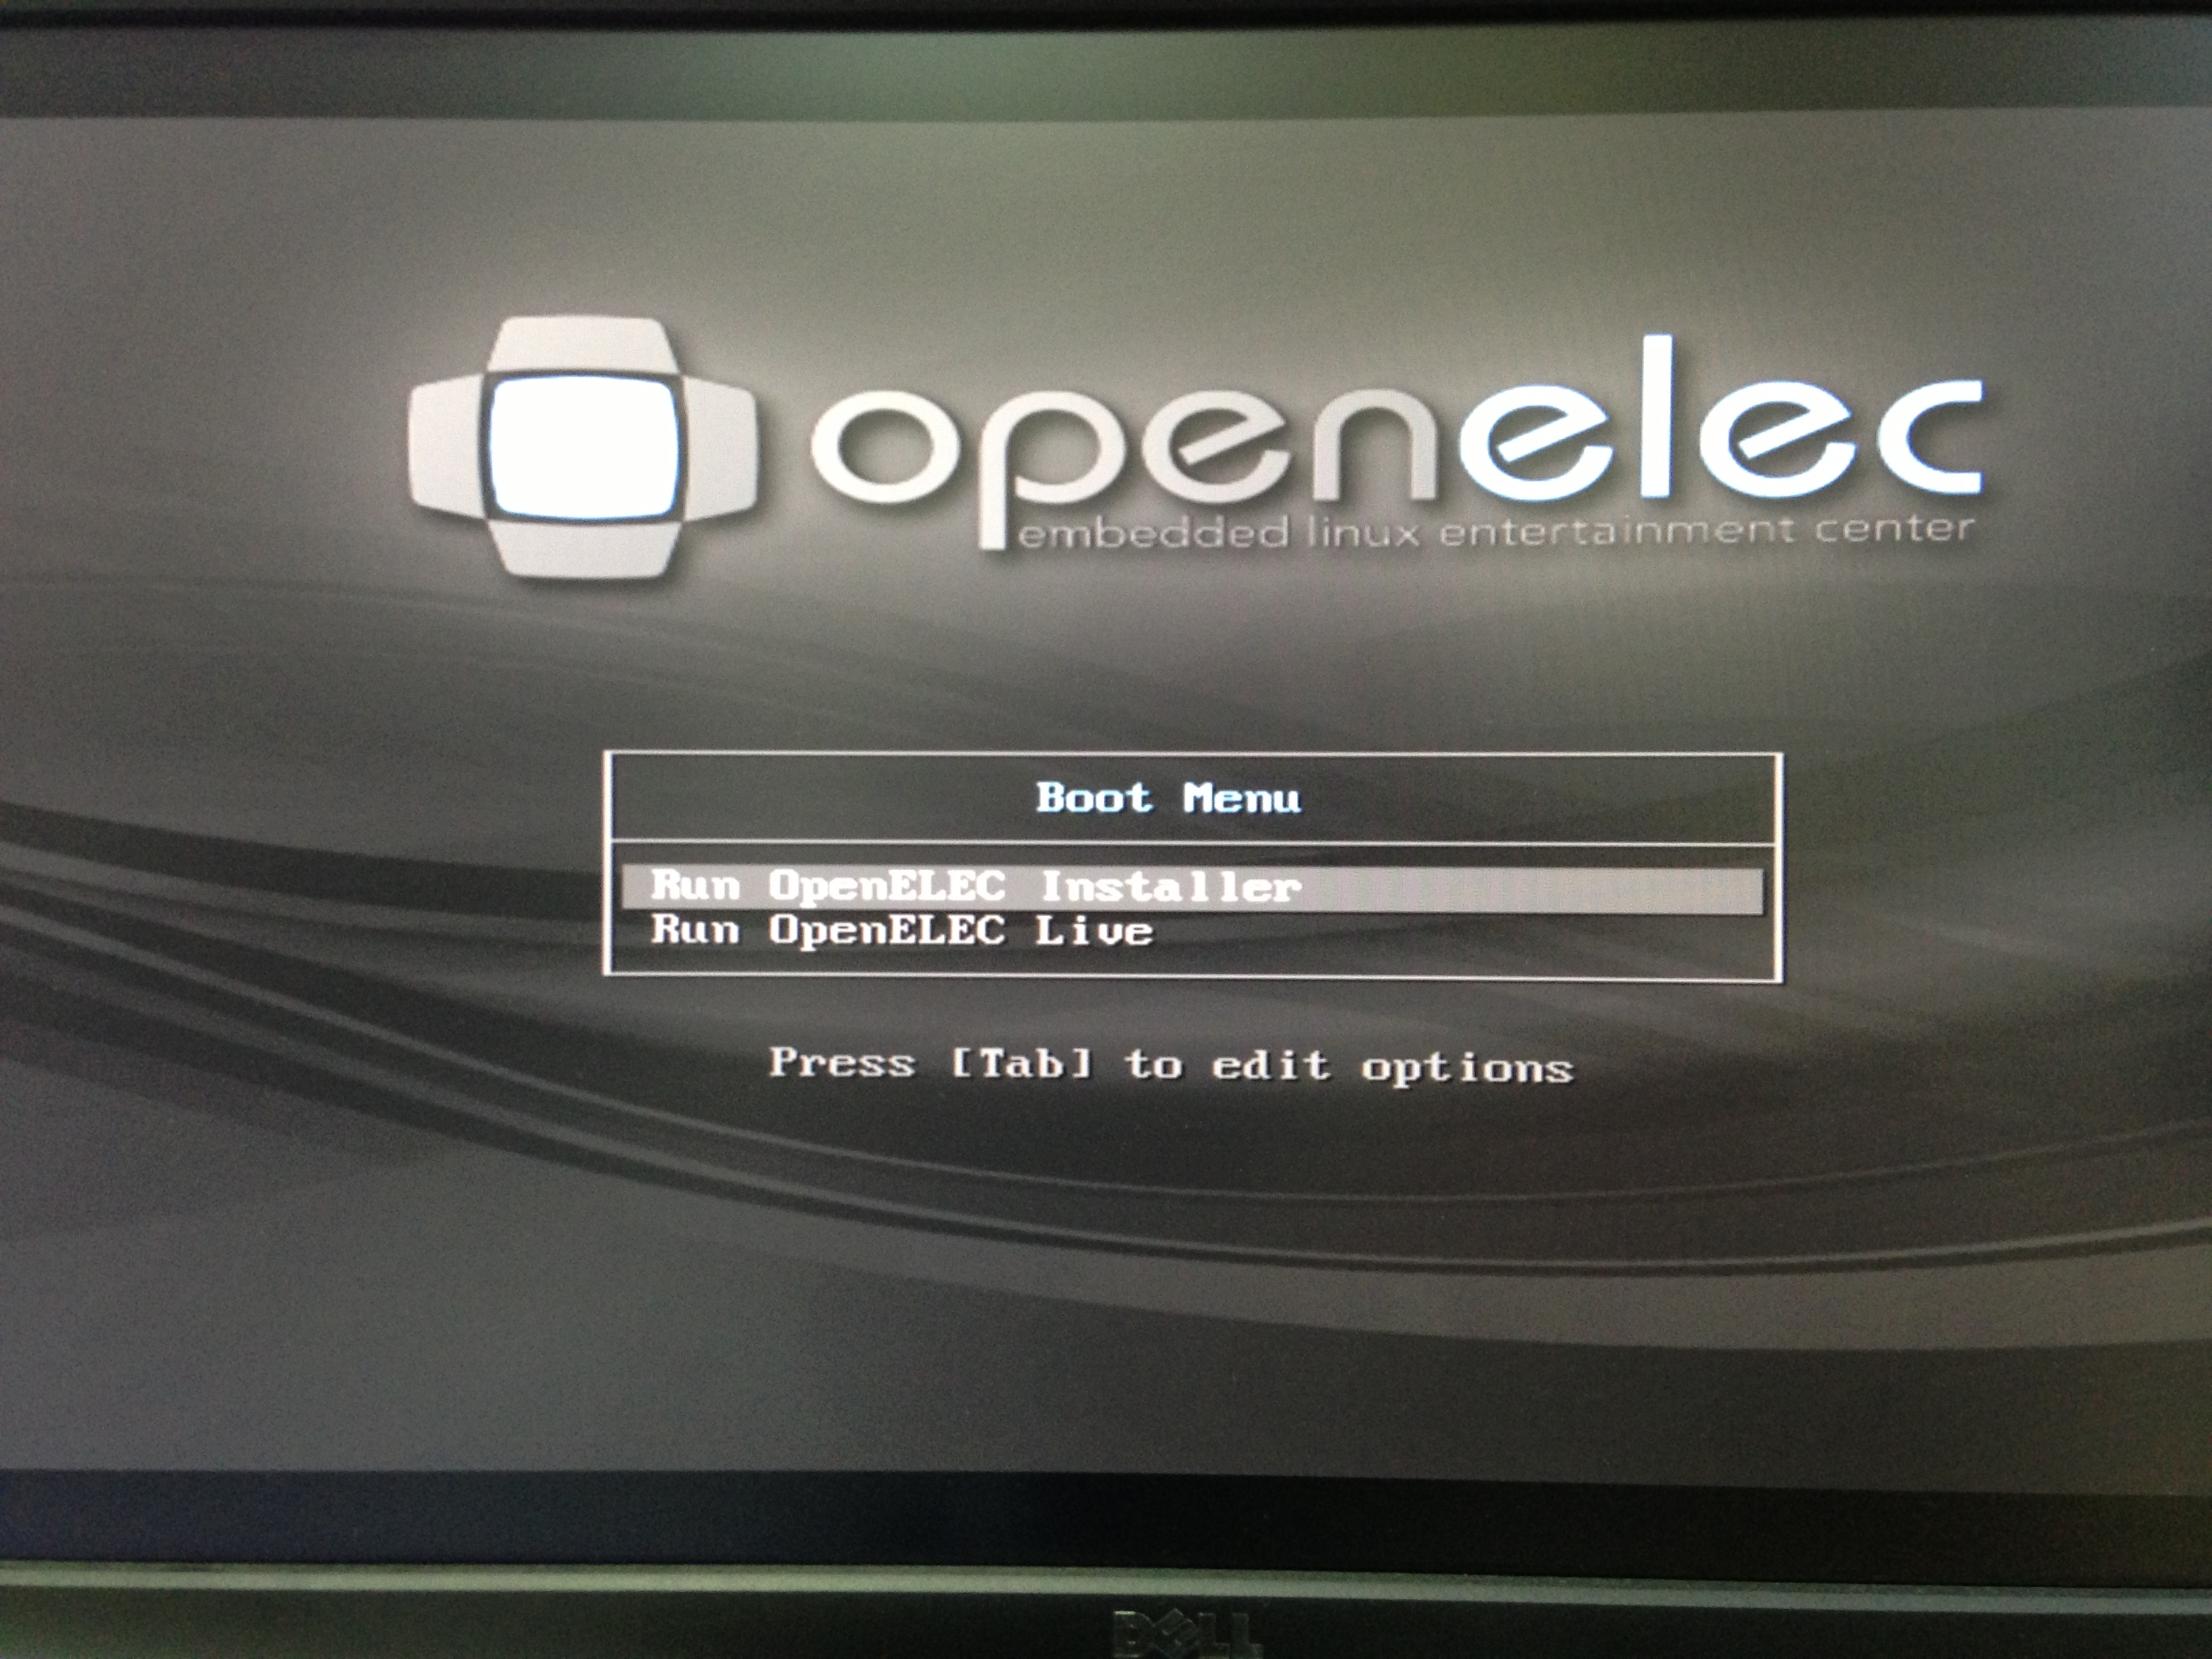
Select the first option: Run OpenELEC Installer

Click OK to get the installer menu:
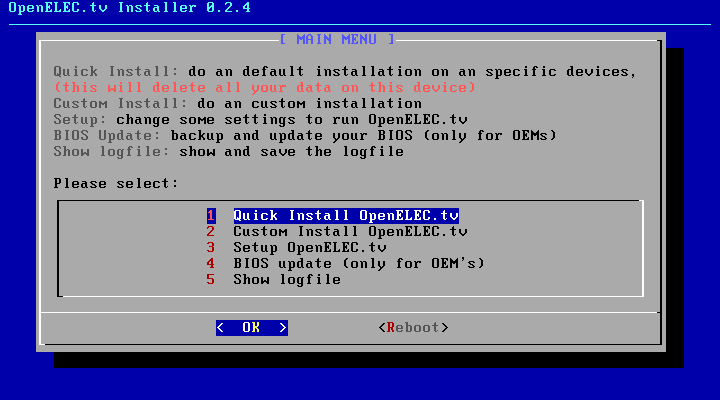
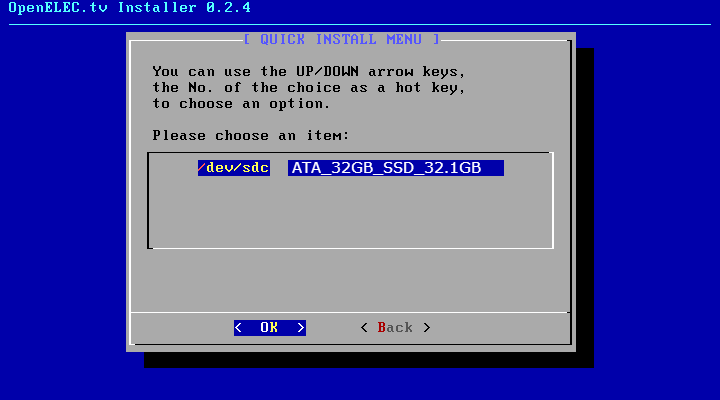
We’re going to carry out a quick install, so just hit enter to get to the next screen. This next screen shows the locations it’s possible to install OpenELEC to. My machine is going to boot from build in 32GB SSD so I’ve only got one option.
If you’ve got more than one disk, make sure you select the right one as the installer will wipe the disk.
Press OK to select the disk:
The installer will ask several question, regular user should answer “No” for the questions.
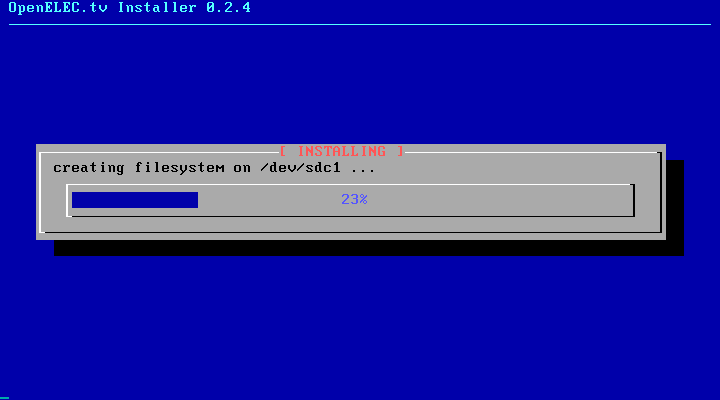
After several confirmations the installer will now go away and wipe, partition and format the disk for you. After that, it will copy over the OpenELEC files and make the disk bootable. Expect this to take a few minutes:
Once it’s finished, the installer will take you back to the main menu. We don’t need anything else here, so use the right cursor to select ‘Reboot’ and hit enter.
When the machine reboots, remove the installer USB key as we don’t need it any longer. As long as you’ve got the system to boot from the media you just installed to, your computer should now boot straight into OpenELEC.